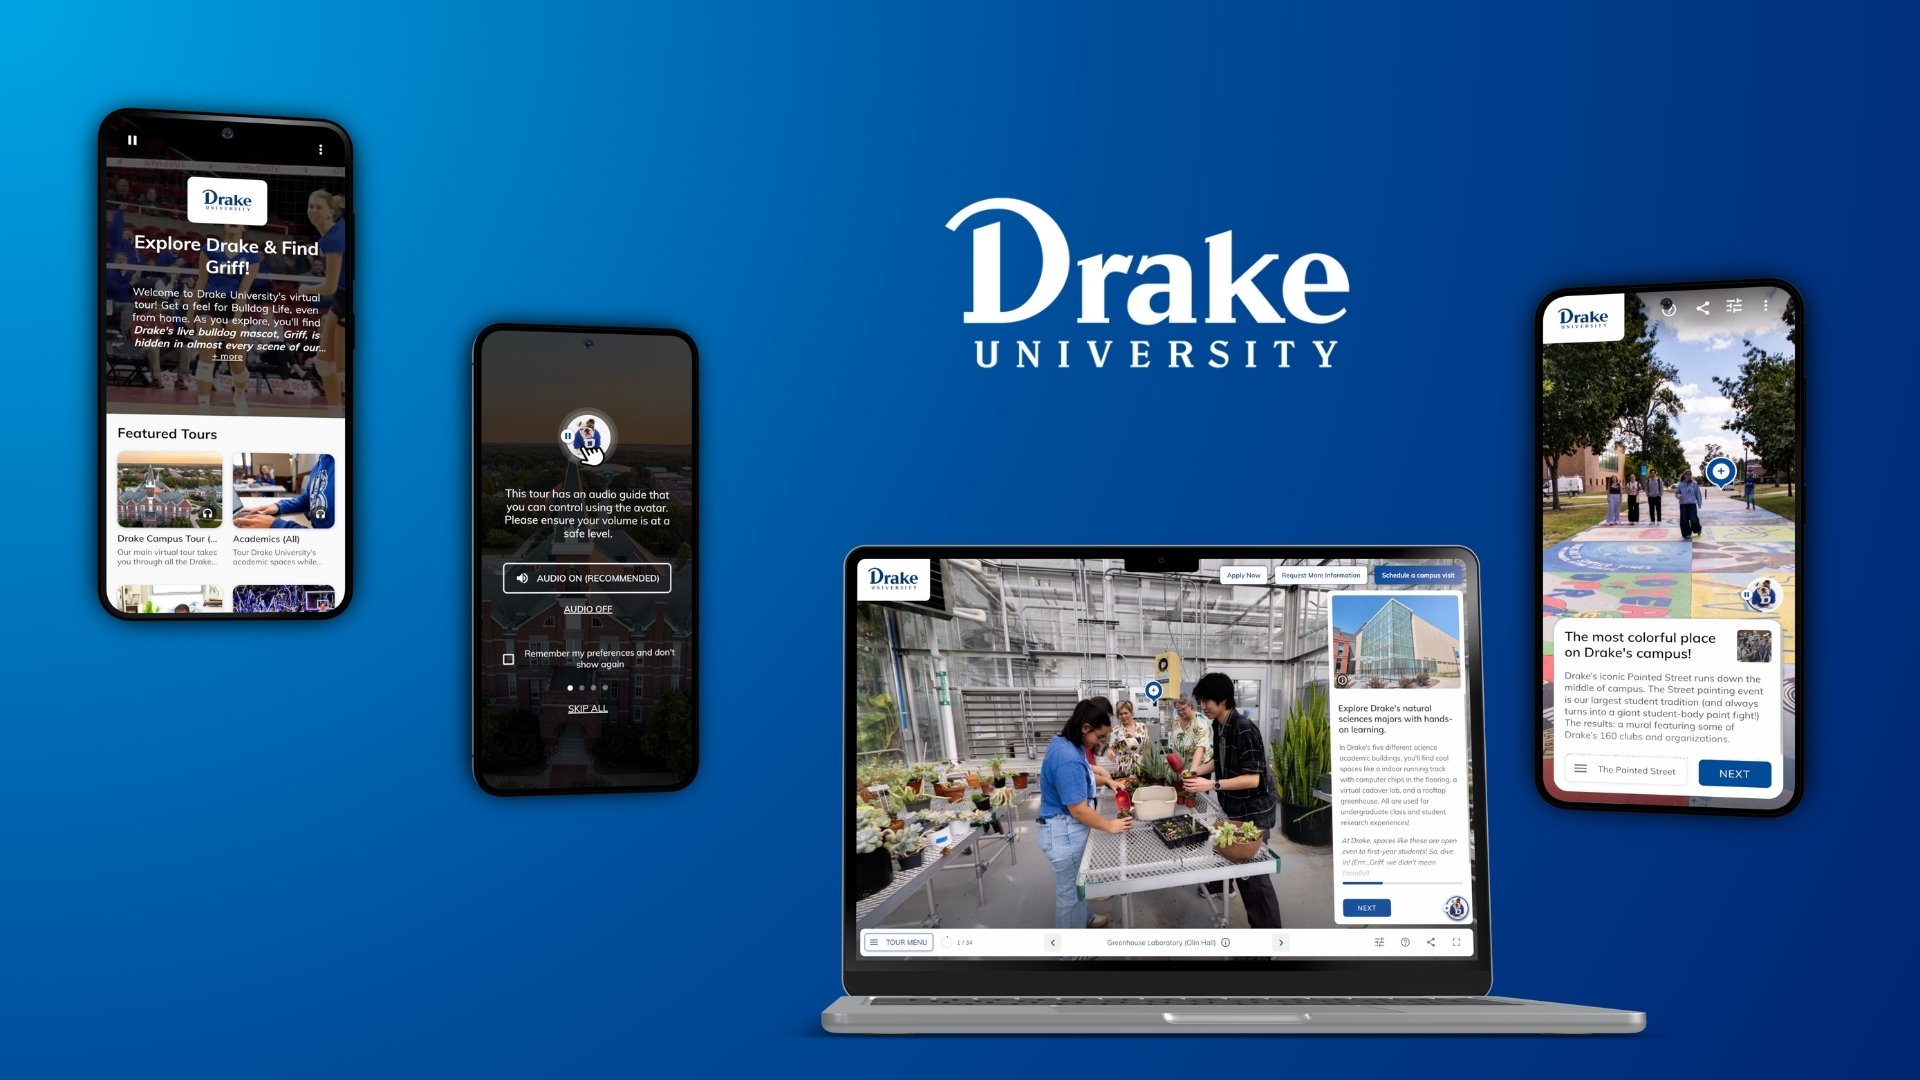
The success of your virtual tour hinges on the ability to craft a narrative for your audience to follow. Using descriptive markers overlayed onto 360° scenes called hotspots, visitors are guided through your virtual tour as hidden stories are unlocked around them. By highlighting points of interest within scenes and sharing descriptions, images, or video, you tell your story in an easy, chronological way that feels like an in-person tour.
There can be a lot involved in creating hotspots. Below are five steps to make the most of this excellent content tool.
Step 1: Identify what to highlight in your scenes
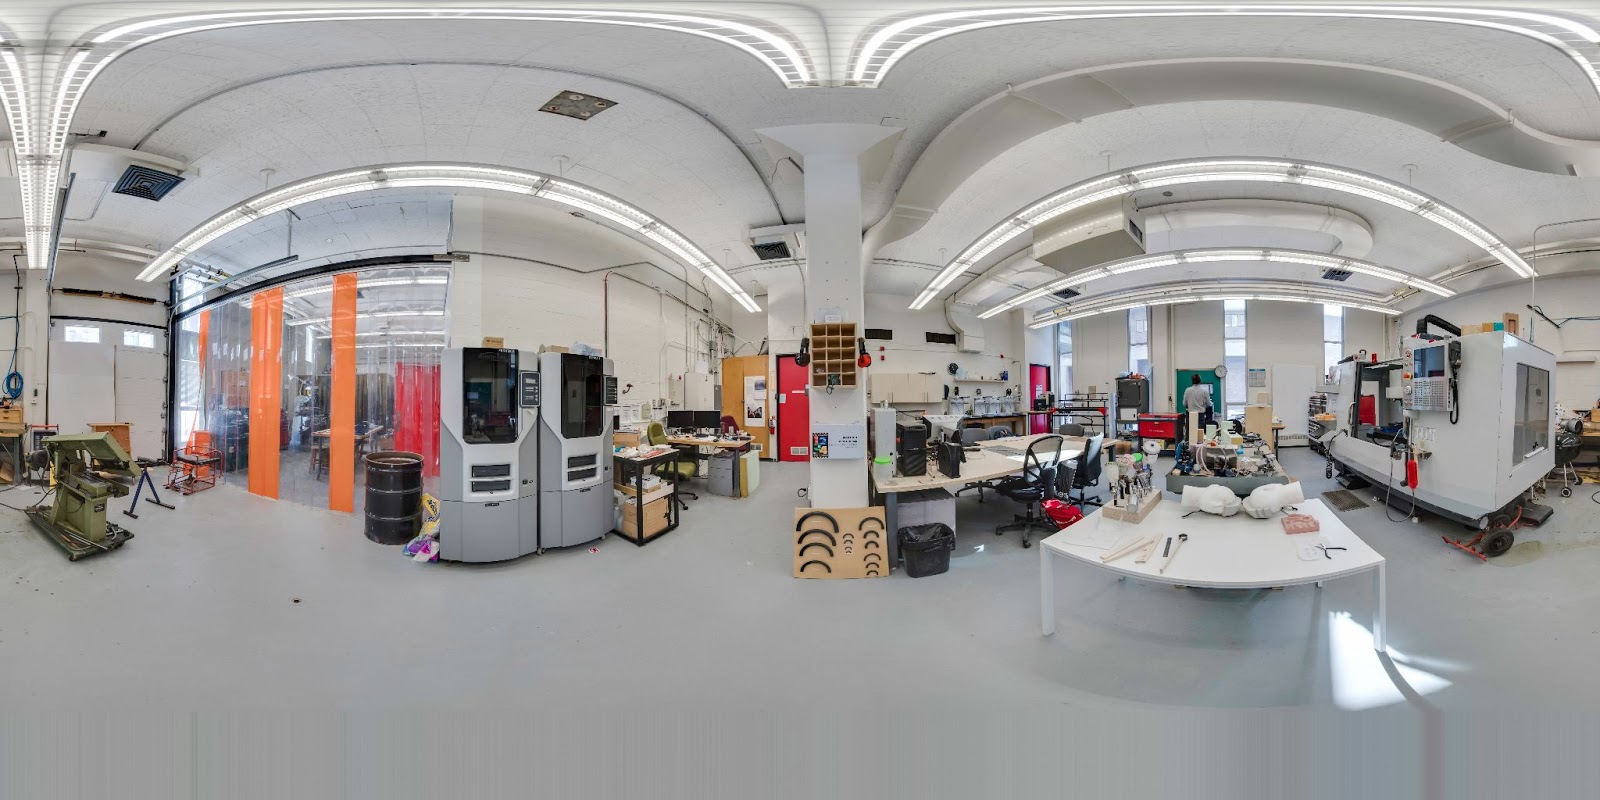
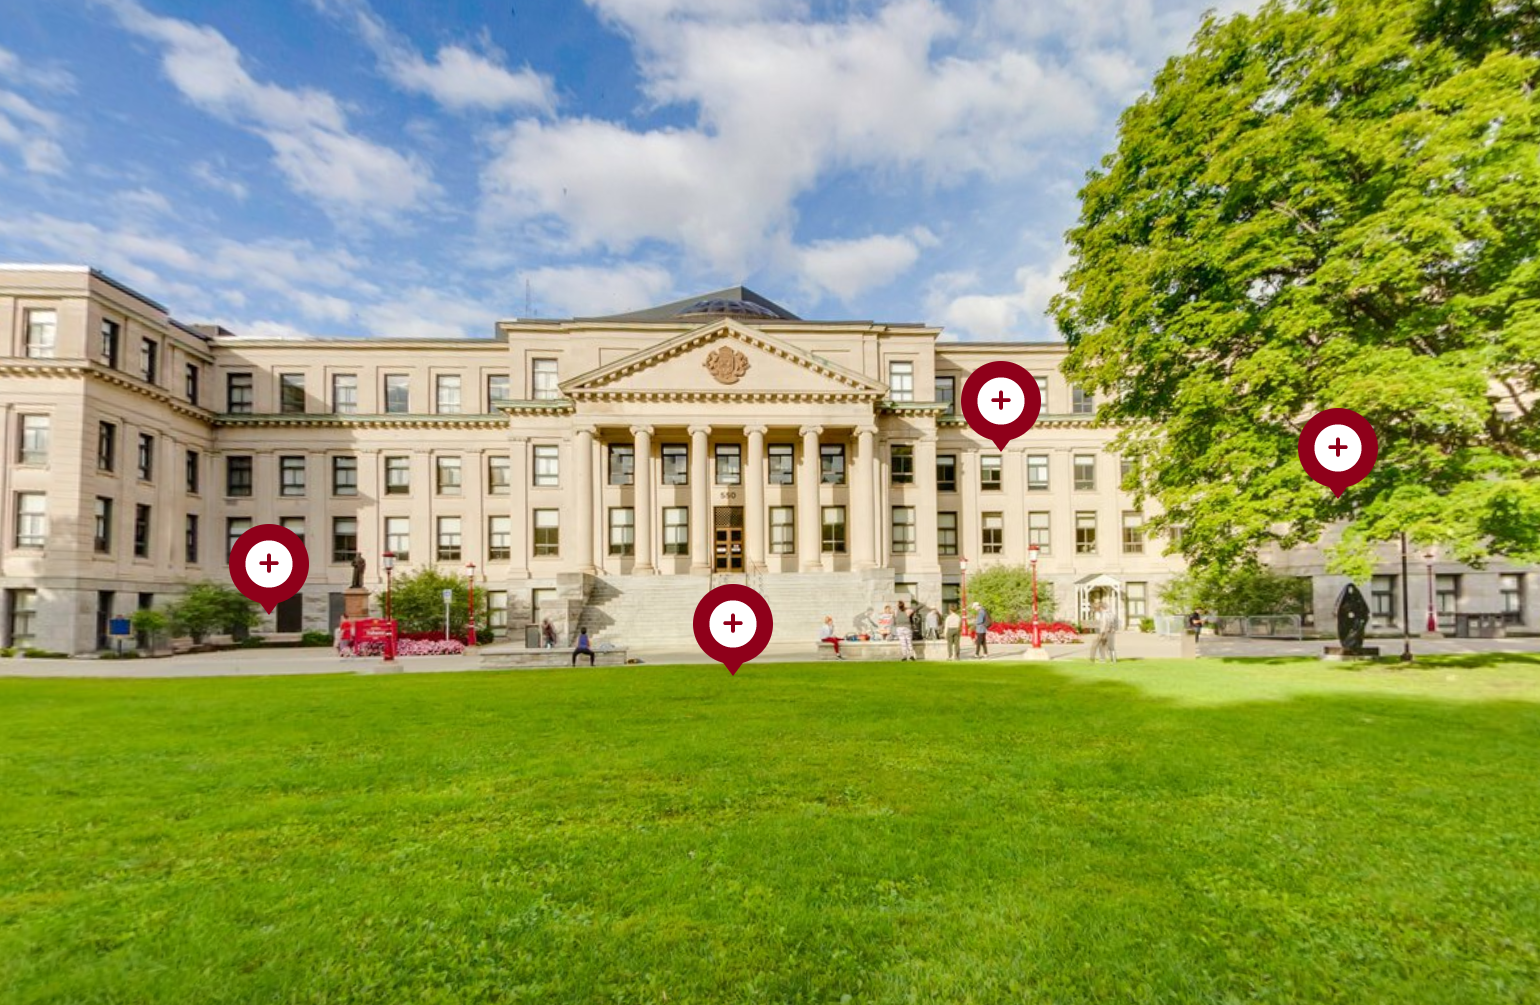
Once your spaces have been photographed, look through the 360° panoramas to identify points of interest in each scene. Hotspots can point out things such as:
- Rooms and infrastructure - study rooms, office space, studio space, workout room
- Equipment, technology and tools - airplanes, computers, 3D printers, you name it
- Services - security, foods, shops, accessibility, parking, rentals
- Opportunities - jobs, workshops, info sessions, work abroad, internships
- Customer projects or achievements - creative works such as art, music, awards
- Scenery or nearby highlights - parks, trails, lakes, recreational services, restaurants, shopping
Start by listing out hotspots that inform and educate visitors about how they will use your space and what makes your organization unique.
Step 2: Consider how many hotspots to add to each scene
A study of over 350,000 page views collected across ninety-six 360° scenes revealed some interesting conclusions about the use of hotspots, as shown in the graph below.
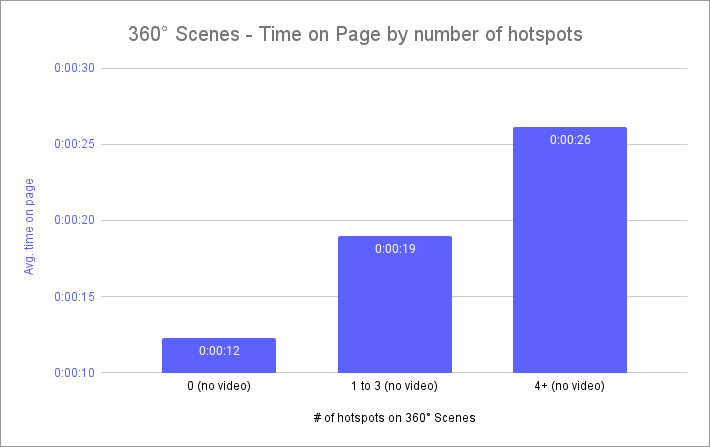
Excluding hotspots with embedded videos (which is discussed in Lights, Camera, Interaction), scenes with no hotspots resulted in users spending 12 seconds on the page. Adding one to three hotspots drove up the time on page by 54%, to 19 seconds. Having four or more hotspots increased the time on page by a further 38%, to 26 seconds. So there is a positive correlation between the number of hotspots on 360° scenes and the time users spend on a particular scene.
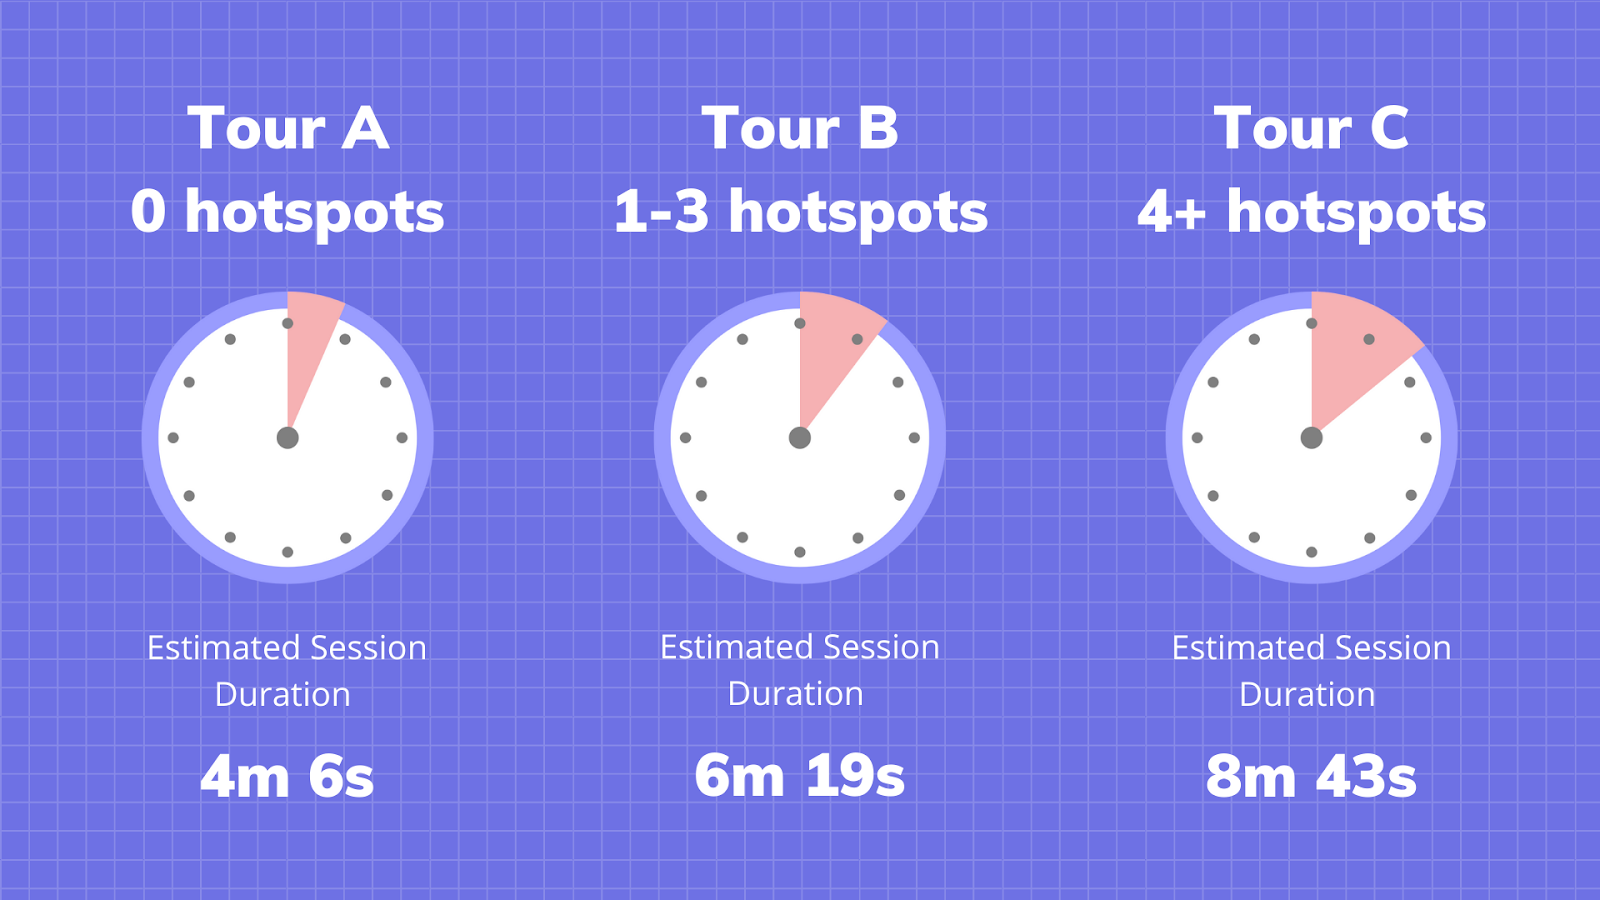
To put this into perspective, let’s say you are creating a tour with 30 scenes, and expect the average visitor to complete about ⅔ of the scenes (20). That would result in a duration of just over 4 minutes on the tour (20 x 12 seconds = 246 seconds).
These examples are illustrative, but based on real time on page data.
One caveat to consider is that scenes with more hotspots had higher exit rates. This means a higher likelihood of users leaving the tour from any given page. Keep this in mind and don’t go overboard with adding too many hotspots per scene.
At the minimum, having at least one hotspot per scene is helpful for conveying to visitors that they are able to look around the 360° scene to explore available hotspots.
Overall, analysis proves that utilizing multiple hotspots has a big impact on engagement, so use the data to determine how many to create.
Step 3: Set up a test tour in Circuit and send a preview link to contributors for review
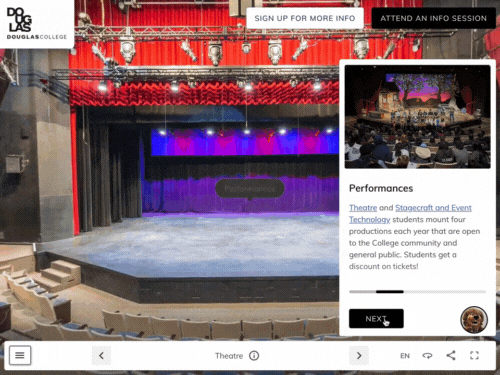
Once you have identified what to highlight, create your virtual tour and add your hotspots in Circuit. To collect feedback, place questions inside descriptions asking for specific details (see below).
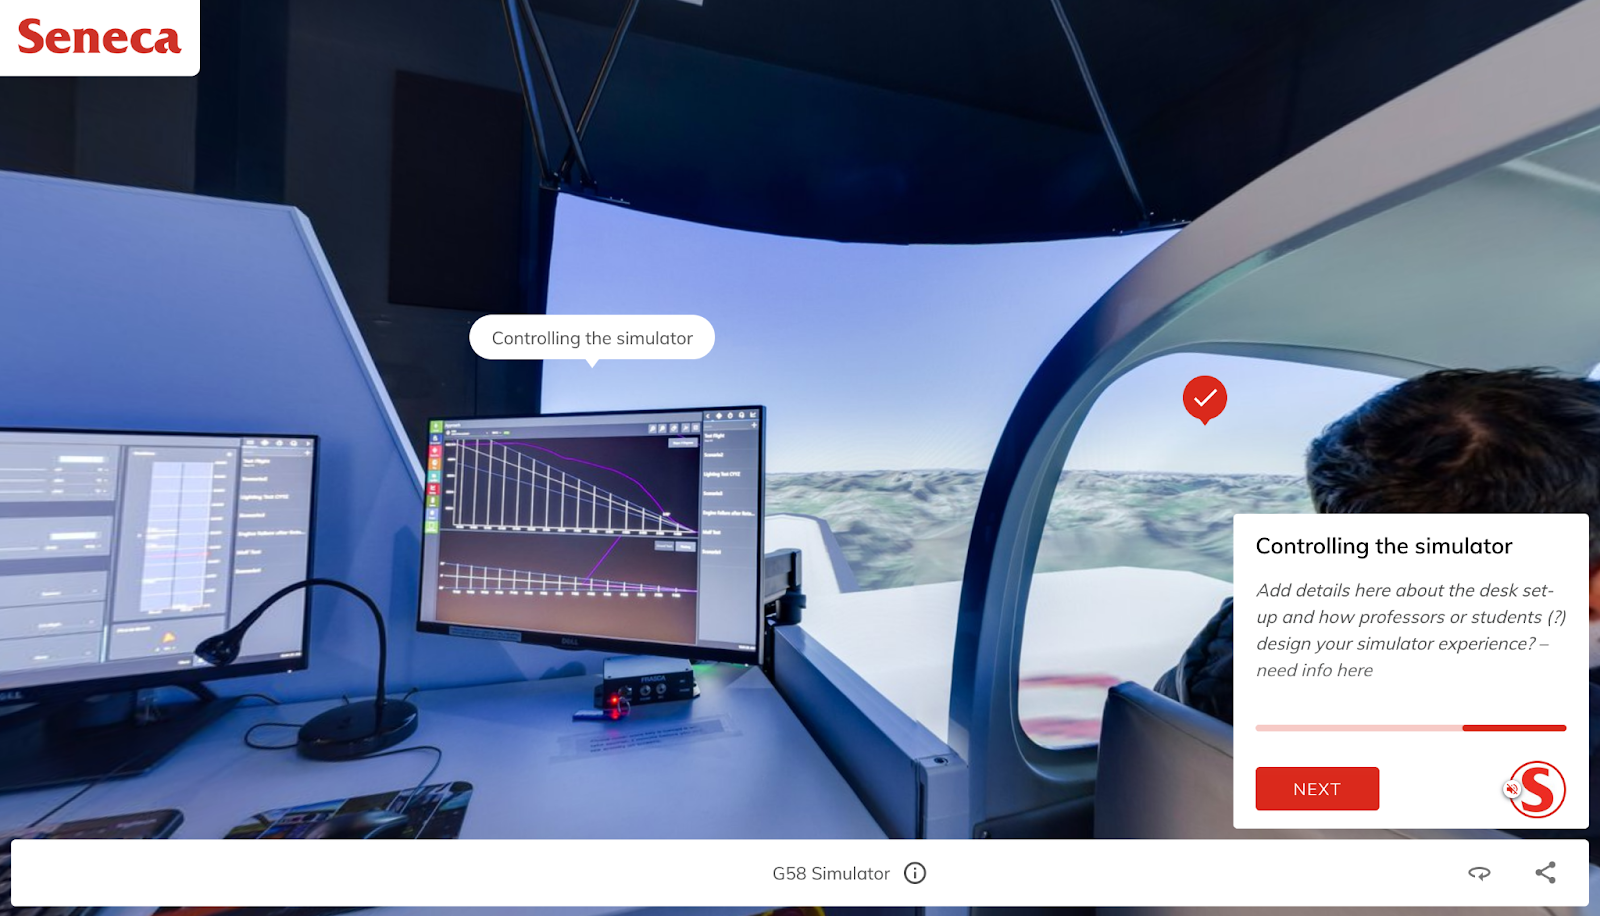
Generate a preview link and send it to stakeholders and subject matter experts to enlist their help in developing hotspot descriptions. The preview functions just like a real site. It will show contributors the user experience and how content is organized on the site, assisting them in giving better feedback.
Step 4: Write text descriptions for your hotspots
Writing hotspots is slightly different from writing scene descriptions, in that it tends to be more specific. Subject matter experts are helpful resources to provide facts and info to highlight. Sometimes background info can get technical, so keep your audience in mind when writing descriptions and include details they will understand. For more on writing for your virtual tour, check out our post on getting started with text descriptions.
Tip: When placing hotspots on your 360° imagery, choose a direction that they will follow, clockwise or counterclockwise,and order them accordingly. This will make the experience smoother for users, since the view will rotate in order as opposed to jumping back and forth.
Step 5: Consider adding video
When highlighting details in your scenes, consider opportunities to use video. Video can show how your space is used, provide testimonials from existing customers, or have a video narrator guide your customers through the tour creating a more rich and engaging experience. The same study referenced above revealed that 360° scenes with video typically have 2X time on page vs those without video, but it comes at the cost of higher exit rates.
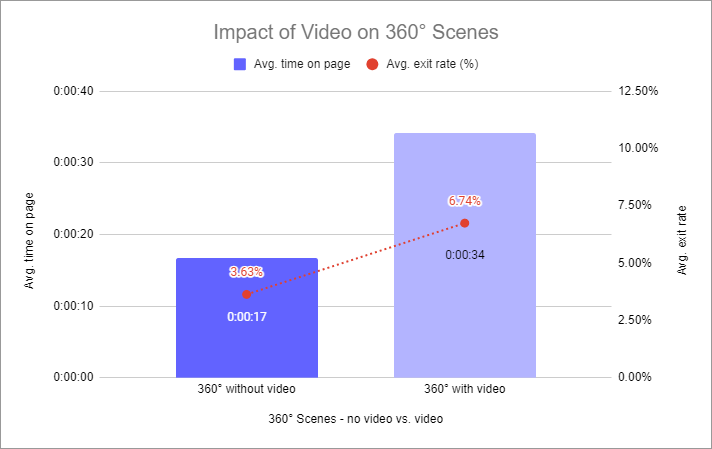
Balance the number of hotspots with the use of video on your 360° scenes. If not using video, more hotspots will deliver higher time on page, and reasonably low exit rates. If including video on a scene, using fewer hotspots can help reduce the chance of exit rates dramatically spiking.
Hotspots are a powerful way to drive engagement in your virtual tour, and can reveal a lot of rich detail about your organization. By following the 5 steps above, you can plan content development, collect info from contributors, write interesting descriptions, and add video features to boost engagement.
Need help crafting the perfect hotspots? Click here to book some time with us.